RizomUV 2022 Release Features
We’re always happy to share new releases with you, and we are excited to share the Rizom 2022 release with you! Some of you have been wondering why we have been so quiet for almost a year, and the answer is that we’ve been hard at work. We have significantly sped up the packaging algorithms, especially with a view to UDIM workflows. This was a time-consuming, massive and complex task.
We also killed AutoFit. Because we knew we could do better.
And we did. Autofit was a one size fits all packing solution, and we saw it was becoming outdated compared to today’s needs. We replaced this with a new, customisable solution based on scaling. Massive overhauls such as this one always generate new or improved features. This one is no different: We reworked grouping to include nesting, overhauled the colour bar to enable selections by distortion or texel density, and implemented seam markers.
We also added spit and polish to the UI as part of writing our manual, complete with easier-to-understand renames, and new icons. As you can understand, we are incredibly proud of this release!
Massive rework under the hood
We spent a lot of time reworking and optimising packing, with a focus on packaging for UDIMs and game-artist needs. When packing, you should experience a significant increase of speed. This rework is one of the main reasons we’ve been so quiet, as this was a very complex task. But we hope you agree with us when we say the effort and wait were worth it
Scaling Replaces Autofit
The scaling options replacing Autofit are a two-step process. Doing it like this allows you to customise your AutoFit rather than forcing a one-size-fits-all pack. Here is how you use it.
• First, set your Scaling Mode: Keep, Average, Follow, or Texel Density.
• Then set your Scaling Factor. The default is 100%
• If you want, you can also set your Initial Orientation at this stage
Rizom will pre-calculate all of this under the hood as you define your settings. once you have defined them, all you have to do next is press P to pack, and it will work as AutoFit did.
You can fine-tune this even further
If you need a more fine-tuned pack, we have added two additional scaling options for you; Scaling Minimum and Maximum. These two are set to Free by default, so they are free to scale as needed to make your pack fit as if you were still using Autofit. These two options can also be used for troubleshooting your pack:
Should your islands be too small or too big to fit into your tile(s), you can use the Minimum and Maximum scaling options to solve that issue. To do that, activate the Texel Density(TD) option in Scaling Mode. This ensures Rizom gets the TD you defined, if any, in the Layout Panel. Once it has a TD to base its calculations on, you can define the scale that needs to be increased or scaled down.
As an example, if you use the default Texel Density setting in the Layout Panel, the Minimum Scale can calculate the Texel Density of 10.24 to reduce the island size from 100 to 1% of that number. And it’s the same with Maximum Scale. It will calculate 10.24 up from 100 to 500%. And of course, if you need everything to be just so, just set everything to 100% in all three dropdowns.
Having these options available rather than a one-size-fits-all will help archviz to game artists get better packs – especially when combined with the New nesting and other group options.
We also added a global parameter called Mix Scales for this. It allows independent scaling. This is to enable big islands to scale down at a larger factor than smaller ones. The feature allows for better utilisation of your UV area but at the cost of getting different Texel Densities in the same tile or group.
Nested Groups
The new Islands and Group panel lets you edit both islands and groups. In addition to adding new functionality like nesting, and group-frame locking, we also put the Lock features from the Packing Panel in here. We did this as you can lock groups via the lock, lock frame and lock overlap options in this panel. This is also the place where you also define how to display your groups. Because RizomUV differentiates between group and group content, you can, for example:
• Lock a group’s frame, but leave the group’s content unlocked
• Let something stay in one place but packable (Like LoD packing tweaks)
• Select to group overlapped items only
The workflows haven’t changed, though: You still select your island(s) and press G to group. Once grouped, you can modify the group as you need, from running a pack (P) to rotate, scale, or align. To nest a group inside a group, just select your islands or elements inside the group, and press G to group – and a nested group will be created. Press CTRL+G to ungroup.
Histograms
We’ve improved the colour bar at the bottom of the screen by turning the Texel Density and Distortion bars into histograms. This means you can now select islands by Texel Density by clicking points on the histogram or dragging to select a range.
Note that Distortion gets its colour value from calculating stretch per island. Texel Density gets its colour values from the Texel Density you defined in the Layout Panel. If it’s all Blue, you have too much space on your polygons, and you need to reduce your Texel Density. Red means there is not enough space, and you need to increase your Texel Density. If it’s Grey, it’s just right!
Seam Markers
A new quality of UV mapping life feature in Rizom 2022 is Seam Markers: A line connecting selected edges to their (cut) counterparts for easier navigation and orientation. You can define the amount you want to show in Edit>Preferences, and their colour will be the same as Wire Over Polys in Edge Mode. Just remember that asking for many seams to be shown can be taxing on your CPU, so if it’s a few years old and you have a geometry-heavy model, be careful not to crank it up to the max.
Improvements
We also improved some of our other, existing features, aiming to improve your unwrapping quality of life even more
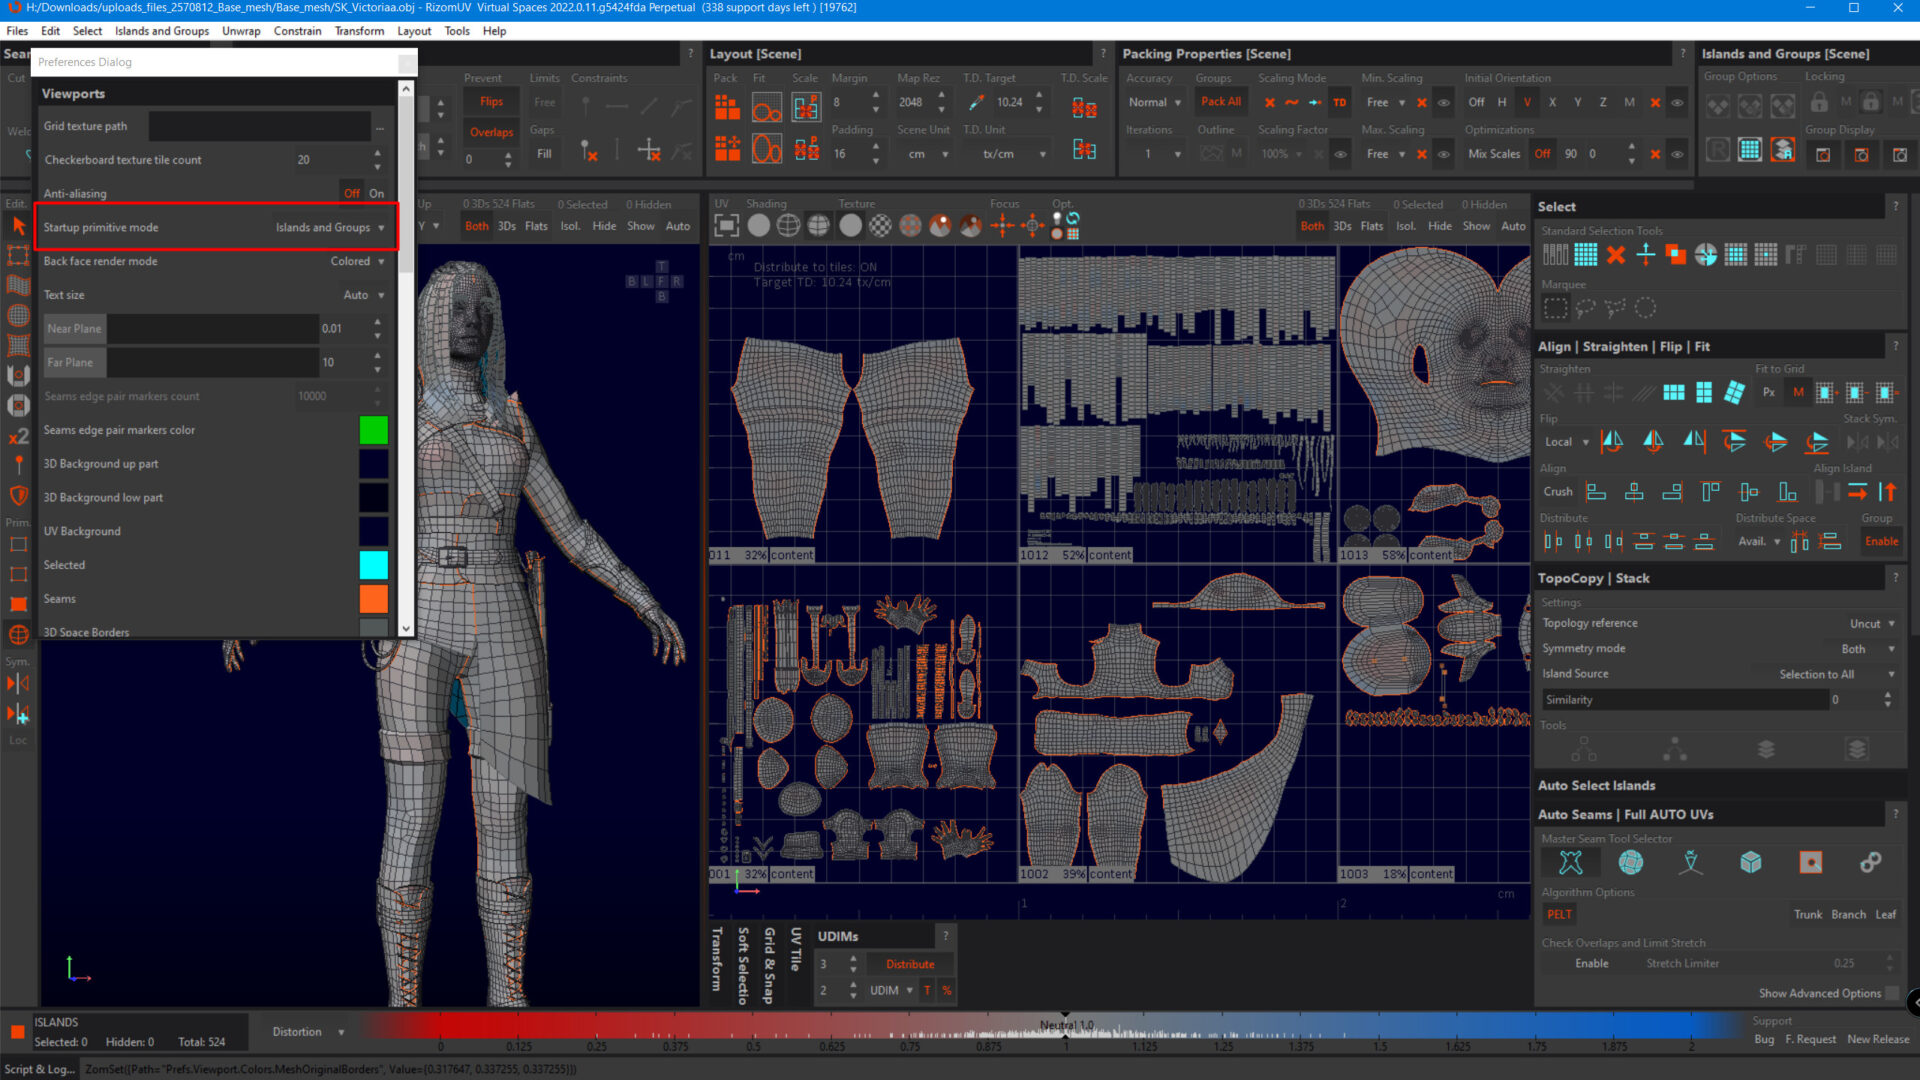
Select Startup Mode
If you’re one of the many who immediately hit F4 after starting up RizomUV, we heard you! You can now select startup mode in Edit->Preferences
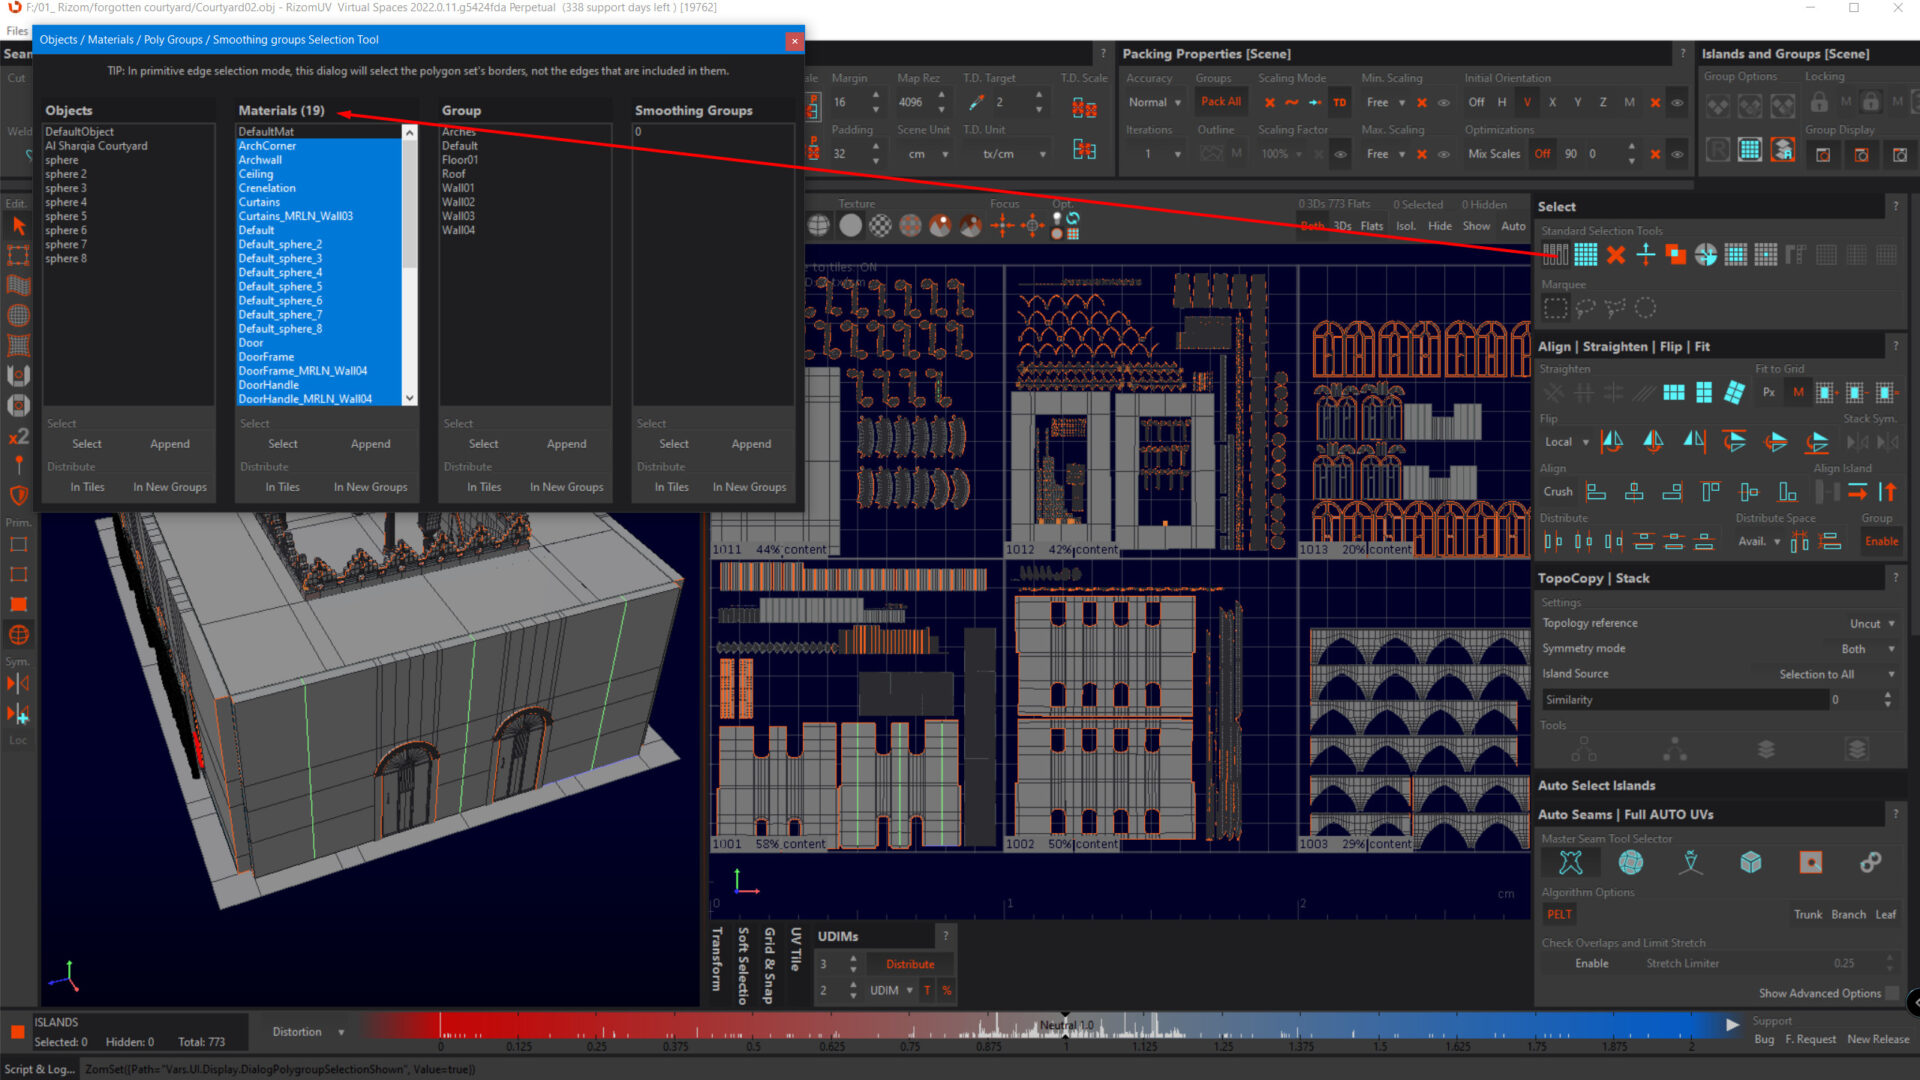
Select Model Groups Counter
Select Model Groups now has a selection counter, so no more manually figuring out how many UDIM tiles to create for your material/object/poly-groups! It will count your selected items as you go.
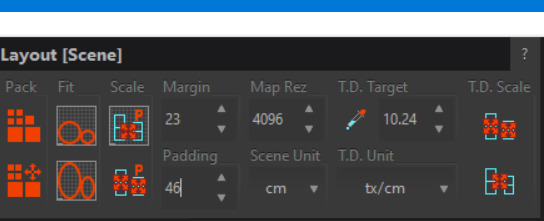
Margins and Padding Are Now Independent
Margins and padding gained their independence! While they still scale with your MapRez setting, they can now be independently set, your MapRez no longer forces an edge or padding scale.