
Floating License Server Installation
Our networking licenses are distributed via license server software, and a license file that contains a number of tokens that can be distributed in your local network. Each time a user launches our software, a token is checked out, each time the software is closed, the token is released. If your license allows X tokens, then X clients will be able to run the software simultaneously.
Note that this page provides the minimal steps required to setup the license system, both on server side and client side. However, you can find more detailed information here about our licensing system software if you should need it.
Install LM-X End User Tools
Download the End-User Tools and LM-X License Server onto your server machine. Use the appropriate installer dependant on whether you have a Windows or Linux server.
Windows: LM-X Server
Windows: liblmxvendor.dll
Linux: LM-X Server
Linux (right click and select “Save link as”): liblmxvendor.so
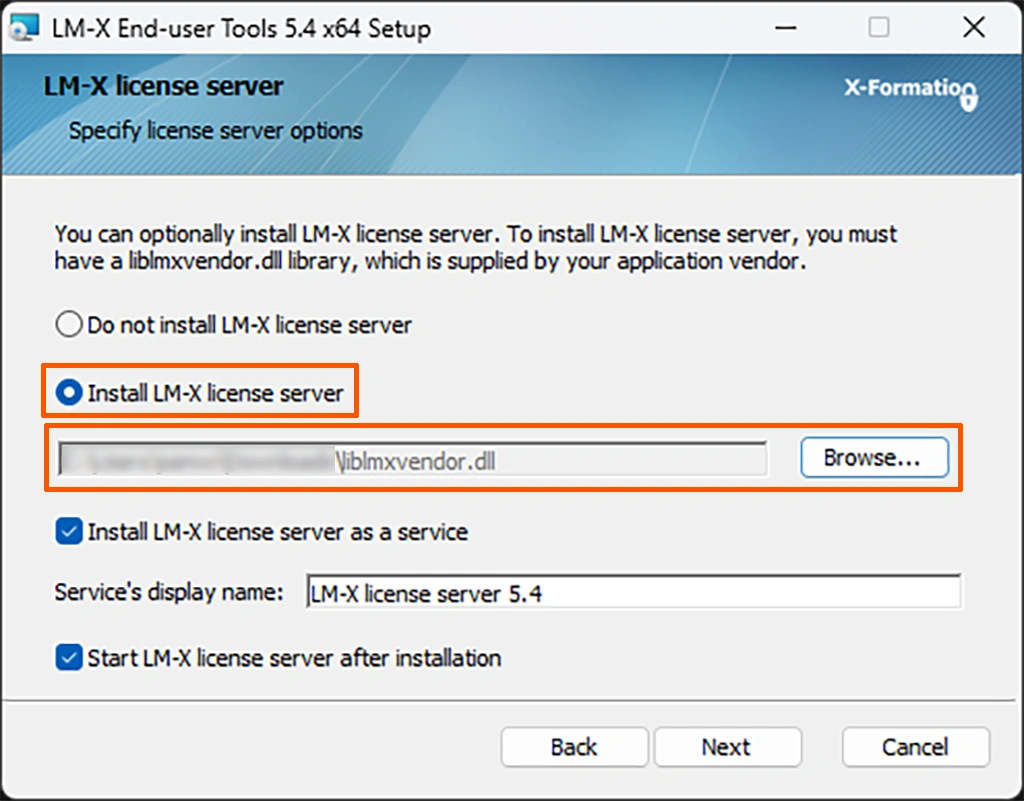
Now run the End-User Tools installer and make sure “Install LM-X License Server” is checked, then press the browse button and navigate to your “liblmxvendor.dll” file.
Copy Your Server’s Ethernet Address
Your ethernet address is a 12 character hexadecimal string, it can be obtained using the “lmxconfigtool” which is included in the “LM-X End-User Tools” you installed in the previous step. You can find it in the the installation location.
Apply Ethernet Address to License
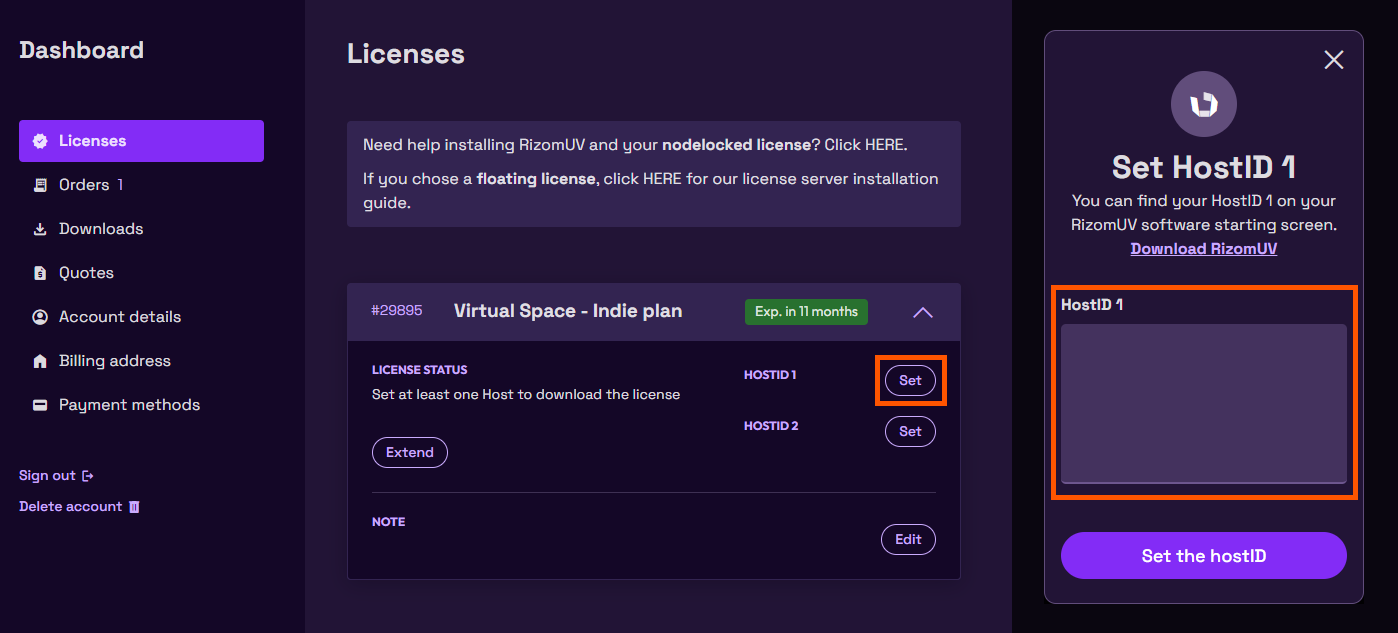
Now that you have your ethernet address, you need to copy it to your license file. This can be done in the Licenses tab in your account page. Click the “Set” button, paste your ethernet address in the popup window, then click the “Set the HostID” button.
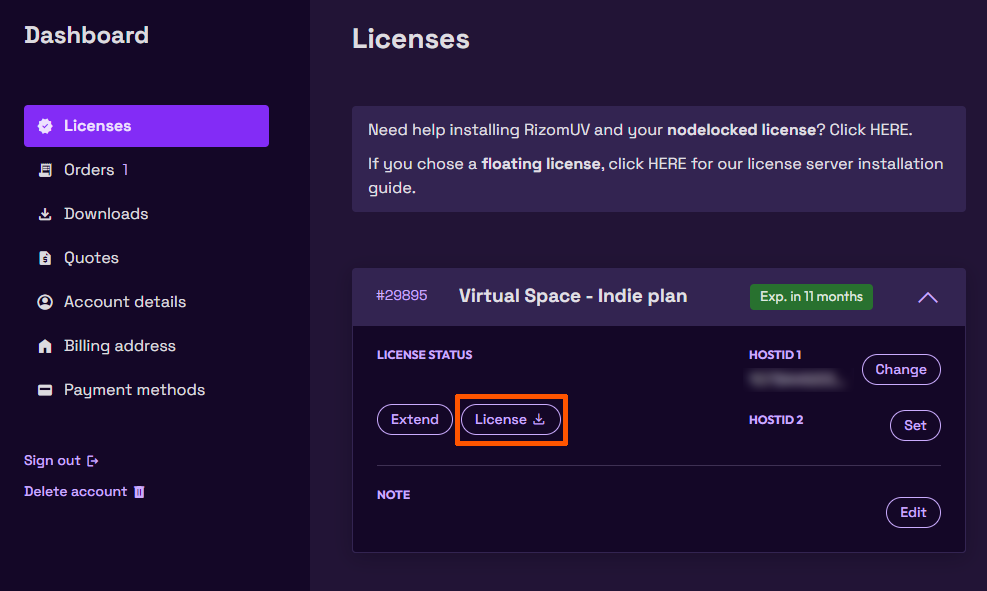
Download License to Server
Now that your ethernet address is set, you can now download the license to your server’s hard drive.
(Note: Do not place the license file on any client machine, the license file must be placed on the server only)
Add License File Location to lmx-serv.cfg File
Now that your RizomUV License file is on your server, you need to add it’s location to the “lmx-serv.cfg” file. This can found in the installation directory of the “LM-X End-User Tools” you installed previously. Within this file, you need to add a line pointing at your RizomUV license like the example image below.
(For Windows servers use back slashes, for Unix servers use forward slashes)
More information about the server config file can be found here

Restart the License Server Software
Since the license server configuration has been changed, the server software must be restarted. Under windows, this can be done using “Services”. Please check that you don’t have any older version of the LM-X license server running. In that case stop them, or even better, uninstall the older versions.

Setup Client Machines
Download and Install the latest release of RizomUV, this can be done here
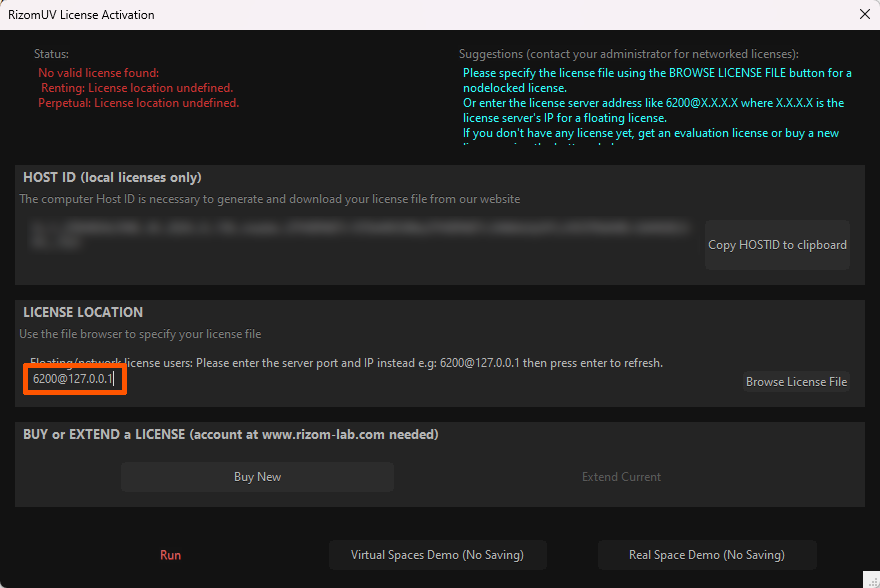
Now open RizomUV, you’ll be presented with the “License Activation Window”. Under the section called “License location”, click the area underneath the message and enter the port number (6200) and the server IP address, then press enter. Setup is now complete, and you can run the program.
Note: If you are experiencing an unresponsive dialog, this means that the server is unreachable, usually because of an incorrect port number, or Incorrect IP address. In this case please wait a minute so that the dialog becomes responsive again, then read the error message and correct the IP if necessary.
Configure Server Path Using Environment Variables (Alternative Method)
On client machines, you may choose to set the license path via an “Environment Variable”.
On Windows machines this can be achieved by setting the Environment Variable “LMX_LICENSE_PATH” so that it contains the port and IP of the server. Example: 6200@XXX.XXX.X.XX (Replace X with server’s actual IP)
Under Linux, you may add the line in the image below, to your /etc/profile (or see your system documentation).

Note: In order for all users of the client machine to be able to use RizomUV, this variable should set for all users.
Silent Install (Optional)
For a “Silent Install” of the Windows setup, use the following.

For no GUI at all, use the following.

Please follow this link for more information about the installer command line.
Verify All Involved Firewalls Have Port 6200 Open
Make sure that port 6200 is open in both directions, for client and server machines for TCP and UDP protocols.
Note: You can change the TCP port to another value other than 6200, but the UDP must be 6200.